
Shipping with Amazon Buy
Amazon Buy is a carrier integration that allows you to process Seller Fulfilled Prime (SFP) orders via Small Parcel Suite. This article reviews the features and services available when shipping Amazon Buy orders through Small Parcel Suite, as well as how to connect an Amazon Buy carrier account to Small Parcel Suite.
Before you begin with the steps below, please take note of the following:
- You must contact your CSM to enable Amazon Buy for your account.
- This service requires your customer to be an official SFP member. Moreover, Extensiv does not assist with SFP program access, requirements, SLAs, etc. It is your and your customer's responsibility to understand these requirements.
- Your customer must use our pre-wired Amazon connection via Integration Manager or Dropstream.
- Each Amazon SKU must be set up in the system under Items > Manage Items. Item aliases are not supported for this connection.
- This service requires you to add the Amazon Buy Add-On to your Small Parcel label subscription. To learn more about this, please contact your Customer Success Manager.
- Amazon does not provide any test environment or the ability to create test orders, which means that all orders must be processed with a live merchant account.
Supported providers
| Label Provider | Supports Amazon Buy? |
| BUKU Ship | No |
| Pitney Bowes | No |
| ShipEngine | Yes |
Supported features
| Feature | Description | Supported? |
| Adult Signature |
Requires recipient to sign for a delivery and be at least 21 years old |
Yes |
| Carrier Insurance |
Insurance available for purchase through carrier |
Yes |
| Delivery Confirmation |
Allows recipient to receive text or email notification upon delivery |
Yes |
| Domestic Shipping | Shipping supported in U.S. |
Yes |
| Electronic Customs Submission | Commercial invoice is automatically delivered to customs after shipping label is printed | N/A |
| End of Day (Electronic) | Order is automatically manifested with carrier | No |
| End of Day (PDF) | Manifest can be downloaded as a PDF file | No |
| International Shipping | Shipping supported outside of U.S. | No |
| Label Reference Fields |
Allows up to three label messages per shipping label |
No |
| Multi-Package Shipping | Multiple packages allowed per shipment |
No |
| Multiple Accounts | Allows connection of multiple prepaid billing accounts | No |
| Rate Shopping |
Returns estimated shipping rates |
Yes |
| Return Labels | Allows printing of return labels | No |
| Signature Confirmation |
Requires someone at or near the delivery address to sign at time of delivery |
Yes |
| Tracking | Verification of delivery progress |
Yes |
Supported services
The ship services listed below are available when shipping Amazon Buy orders in 3PL Warehouse Manager. Please note that these service names may have slight variations when mentioned elsewhere.
| Service | Transport Territory |
| DYNAMEX Rush | United States |
| DYNAMEX Same Day | United States |
| FedEx Home Delivery | United States |
| FedEx 2Day | United States |
| FedEx 2Day A.M. | United States |
| FedEx Express Saver | United States |
| FedEx Express Saver One Rate* | United States |
| FedEx Ground (Non-Prime orders only) | United States |
| FedEx Priority Overnight | United States |
| FedEx Priority Overnight One Rate* | United States |
| FedEx Second Day AM One Rate* | United States |
| FedEx Second Day One Rate* | United States |
| FedEx Standard Overnight | United States |
| FedEx Standard Overnight One Rate* | United States |
| OnTrac Ground | United States |
| UPS 2nd Day Air | United States |
| UPS 3 Day Select | United States |
| UPS Ground | United States |
| UPS Next Day Air | United States |
| UPS Next Day Saver | United States |
| USPS First Class Mail | United States |
| USPS Media Mail | United States |
| USPS Parcel Select | United States |
| USPS Priority Mail | United States |
| USPS Priority Mail Cubic | United States |
| USPS Priority Mail Express | United States |
| USPS Priority Mail Express Flat Rate Envelope | United States |
| USPS Priority Mail Express Legal Flat Rate Envelope | United States |
| USPS Priority Mail Express Padded Flat Rate Envelope | United States |
| USPS Priority Mail Flat Rate Envelope | United States |
| USPS Priority Mail Large Flat Rate Box | United States |
| USPS Priority Mail Legal Flat Rate Envelope | United States |
| USPS Priority Mail Medium Flat Rate Box | United States |
| USPS Priority Mail Padded Flat Rate Envelope | United States |
| USPS Priority Mail Regional Rate Box A | United States |
| USPS Priority Mail Regional Rate Box B | United States |
| USPS Priority Mail Small Flat Rate Box | United States |
*These are special package services that require items to be packed in specific packaging to return the correct rates. Package definitions are set up under Orders > Manage Packaging with the appropriate descriptions—see Shipping with FedEx One Rate® to learn more.
Connection guidelines
To start shipping with Amazon Buy in 3PL Warehouse Manager, you must first configure your Amazon Seller Central Account, connect your carrier account to Small Parcel Suite, and configure your inbound orders appropriately. Each of these steps are detailed below.
Step 1: Configure Seller Central account
Before adding an Amazon SFP account to Small Parcel Suite, your customer must configure their Amazon Seller Central account to work with ShipEngine as a label processing partner.
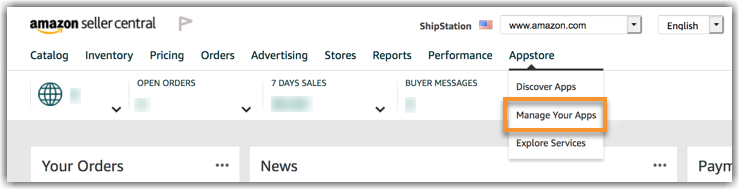
- Log in to Amazon Seller Central.
- From the top navigation menu, select Appstore > Manage Your Apps.
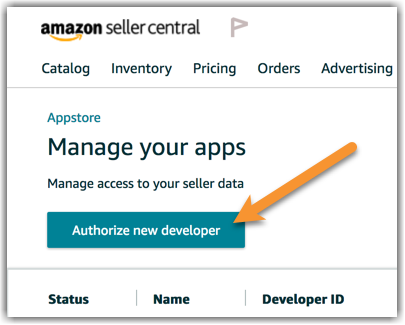
- Click Authorize New Developer.
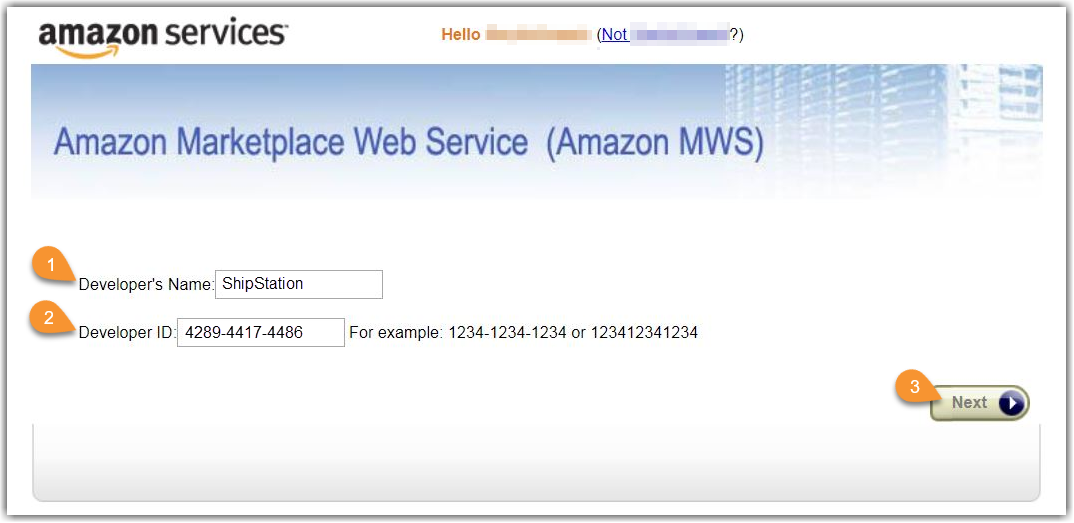
- Enter ShipStation as the 'Developer's Name' and 4289-4417-4486 as the 'Developer ID', then click Next.
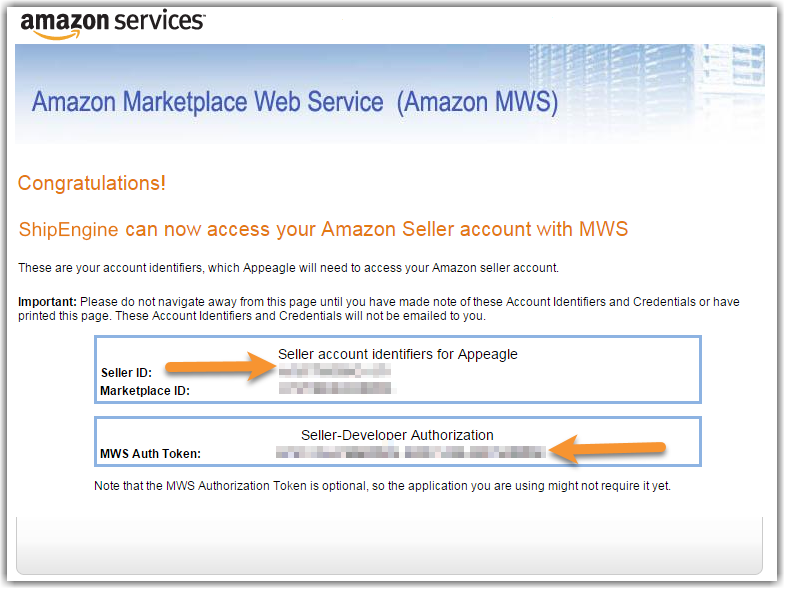
- Accept the license agreement, then click Next. Take note of the 'Seller ID' and 'MWS Auth Token' values, as these values are required to connect your Amazon Buy account to Small Parcel Suite in the next section.
Step 2: Connect Amazon Buy to Small Parcel Suite
Once your Amazon Seller Central account is configured, you can connect your customer's carrier account for Amazon Buy to Small Parcel Suite.
Please note that the Amazon Buy account must be set up as a customer-level carrier account. Amazon Buy is not supported as a warehouse-level account.

- Navigate to the Small Parcel space, then select Settings and choose a customer from the drop-down menu.
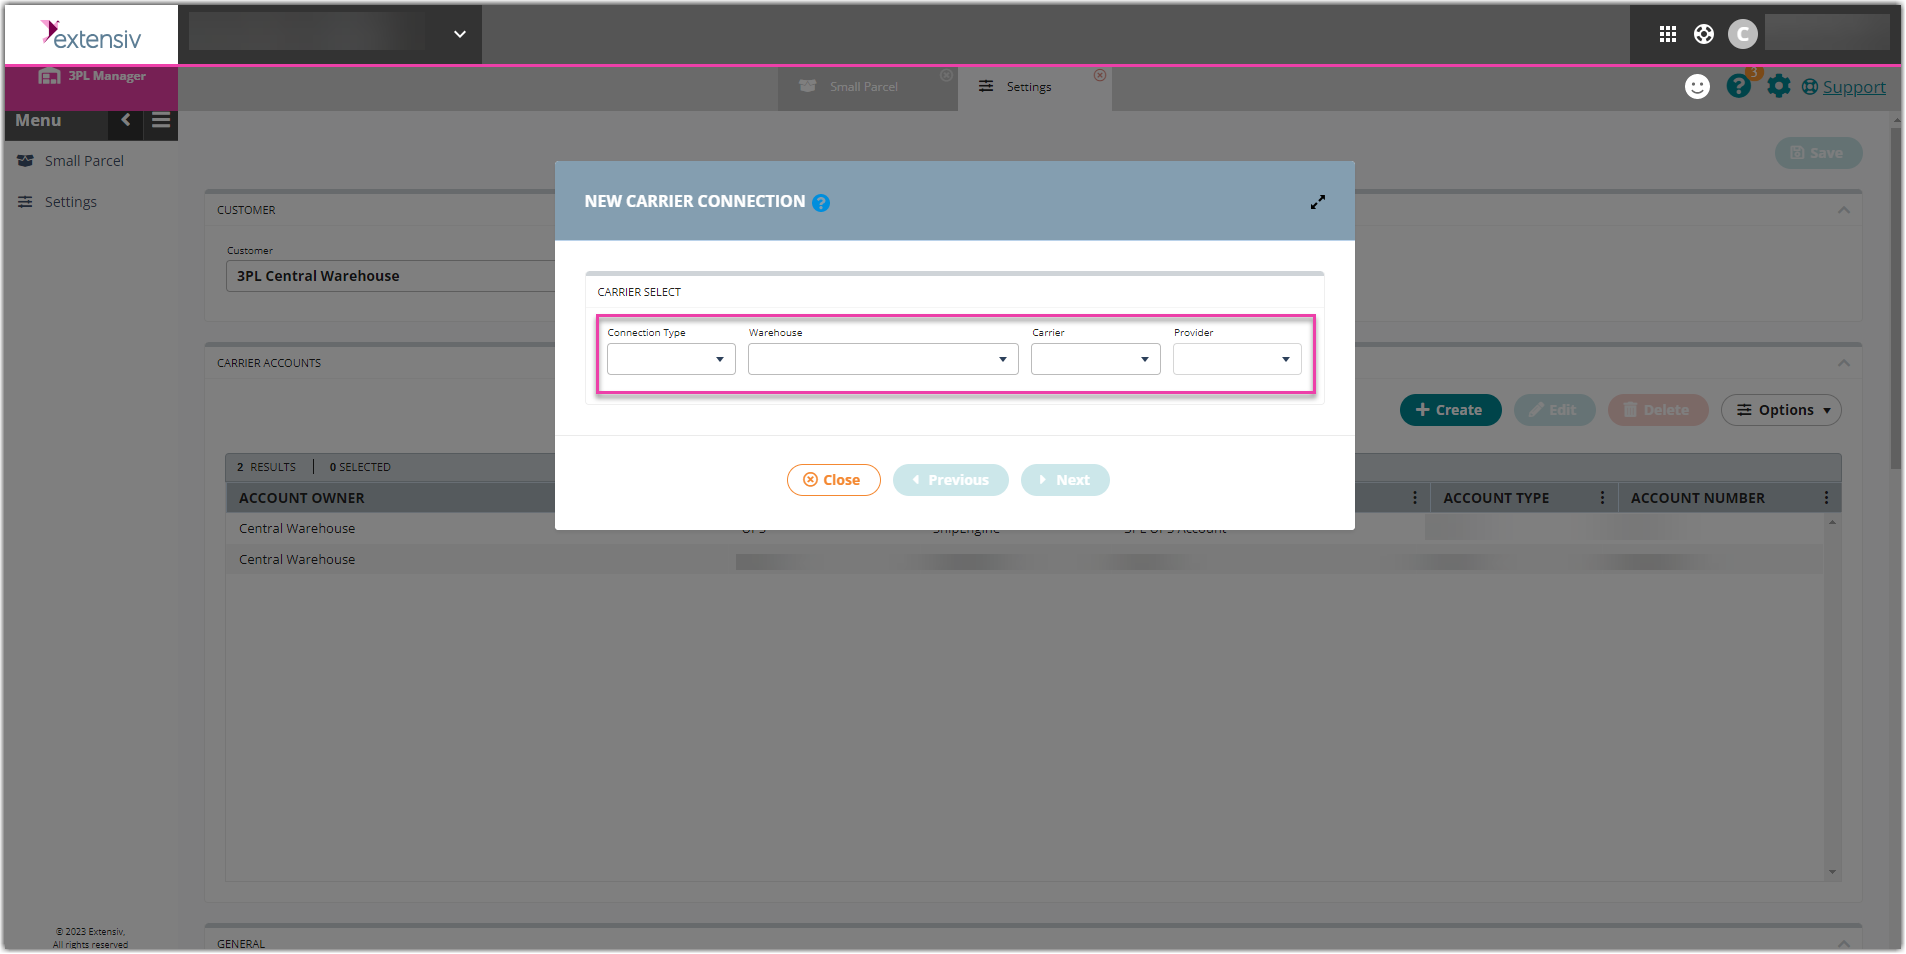
- In the Carrier Accounts section, click Create, then select Customer Account, Amazon Buy, and click Next.
- Provide the required account credentials, including the Seller ID and MWS Authentication Token generated for the merchant's Seller Central account in the previous section, then click Connect.
- Once the customer account is connected, locate the Rate Shopping section at the bottom of the Settings page to enable Amazon Buy as a rate shopping carrier. Note: please only enable Amazon Buy as a rate shopping carrier to avoid non-Amazon buy rates from being selected.
- Click Add to create a rate shopping rule for the ship service that will be present on incoming Amazon Buy orders, then click Save.
Please note that "SecondDay" is an example value in the screenshot above. The Ship Service Keyword value can be any value as long as it is present in the 'Service' field of an order, but please be aware that this value cannot be an existing service level from any carrier.
- Click Save to apply your rate shopping logic and receive a confirmation message.
Step 3: Configure inbound orders
The Amazon Buy connection requires additional data, specific to Amazon orders, to generate an Amazon Buy shipping label. To successfully process labels, your order aggregator (e.g., DropStream or Integration Manager) must be configured to include this data exactly as described below.
-
Amazon Order Number: Inserted as order's Reference Number.
-
Amazon Internal Item Number: Inserted as a custom field on each order line item—the custom field must have a "Name" of either "InternalControlNumber" or "amazon_OrderItemId".
You can add this custom field on an ad-hoc basis or configure this field to display as optional or required on all of a customer's orders—see Understanding Custom Fields to learn more.
-
Carrier: Amazon Buy orders must be configured to use the Amazon Buy carrier.
-
Service: Amazon Buy orders must include the Ship Service Keyword configured for rate shopping.