Configuring Small Parcel Settings
The Settings page in the Small Parcel space allows you to manage your SmartParcel configuration.
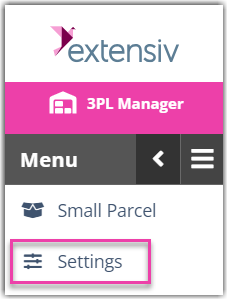
To access the Settings page within the Small Parcel space, click Settings from the side navigation menu.
Once there, select a customer from the drop-down menu. Continue reading below to learn about each section.
Carrier Accounts
The Carrier Accounts section allows you to connect new carrier accounts and manage existing carrier accounts.
- To learn how to connect a new carrier account, see Shipping with SmartParcel to find guidelines for each carrier.
- To learn how to manage an existing carrier account, see Managing Carrier Accounts.
- To learn about our ecosystem of Label Providers and Carriers, see Connecting Carriers to Providers.
General
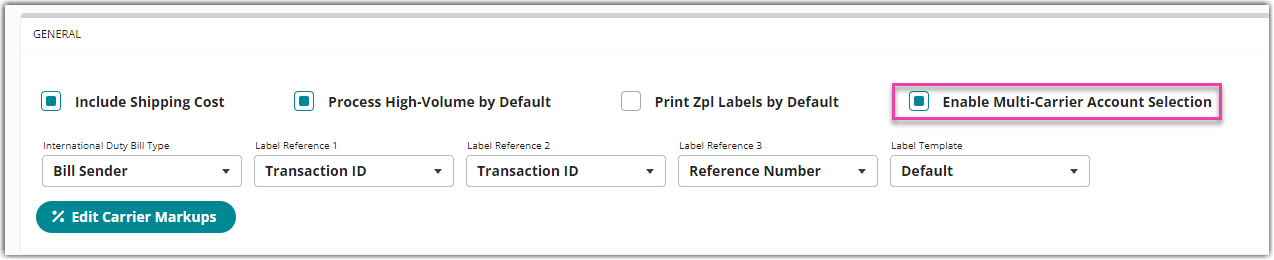
The General section is used to define several basic SmartParcel settings—including enabling charge returns for freight fees, specifying the customer's USPS provider, creating carrier-based markups, and more.

The checkbox options in this section are used as follows:
Enable Multi-Carrier Account Selection: This setting will allow you to select between multiple accounts from the same carrier. When you click Edit Shipping Information, you will be presented with all connected accounts in Small Parcel Suite available for that order and customer.
-
Include Shipping Cost: When checked, enables SmartParcel to return shipping costs for each order that contains prepaid freight fees
- As an additional option, you can also mark these charges up by a flat rate or a percentage using the 'Edit Carrier Markups' button (reviewed below).
- Please note that when billing third-party, SmartParcel cannot return shipping costs.
- When you set “Include Shipping Cost”, it will apply to all shipments for this customer.
- Process High-Volume by Default: When checked, High-Volume is automatically selected as the 'Process As' value for this customer in the Pack and Ship dialog
- Print ZPL Labels by Default: When checked, ZPL is automatically selected as the label format when shipping in the Pack and Ship dialog.

The drop-down fields in this section are used as follows:
-
International Duty Bill Type: Defines the party responsible for paying taxes and duties on any international order sent from the specified customer
- Bill Sender: The shipper pays the taxes and duties
- Bill Recipient: The recipient pays the taxes and duties
-
Label Reference 1–3: Allows you to specify additional data points to include on a shipping label
- These are also commonly referred to as label messages or reference fields.
- Please note that different carriers have different rules regarding reference fields.

Below the drop-down fields is the option to configure carrier-based markup costs. Markups allow you to add a percentage-based or flat rate adjustment to the shipping charge provided by the carrier, which is automatically applied at the time a shipping label is printed, so that you can bill your customer for the shipping costs.
Please note that when billing third-party, costs cannot be returned.
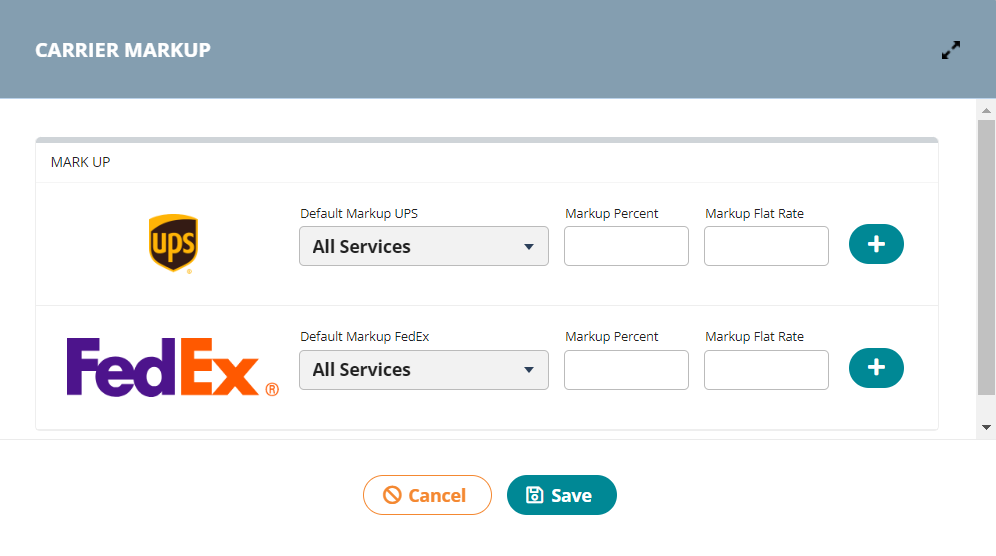
To create a carrier-based markup fee, click Edit Carrier Markups. This opens the Carrier Markup dialog, which lists each carrier that you've connected to SmartParcel for this customer.
- To create a 'Default Markup' that applies to each of a carrier's ship services, enter a 'Markup Percent' or 'Markup Flat Rate' as needed.
- To create a ship service-specific markup fee that overrides the default markup, select plus icon, choose a ship service from the 'Service Level Override' drop-down list, then enter a 'Markup Percent' or 'Markup Flat Rate' as needed. Repeat for each service that requires a different markup fee.
- To delete a 'Service Level Override' markup, select the minus icon.
- Repeat for each carrier as needed, then click Save.
Returns
The Returns section allows you to specify which services are used in the event of a return, as well as the return address you want to utilize for this customer's labels.
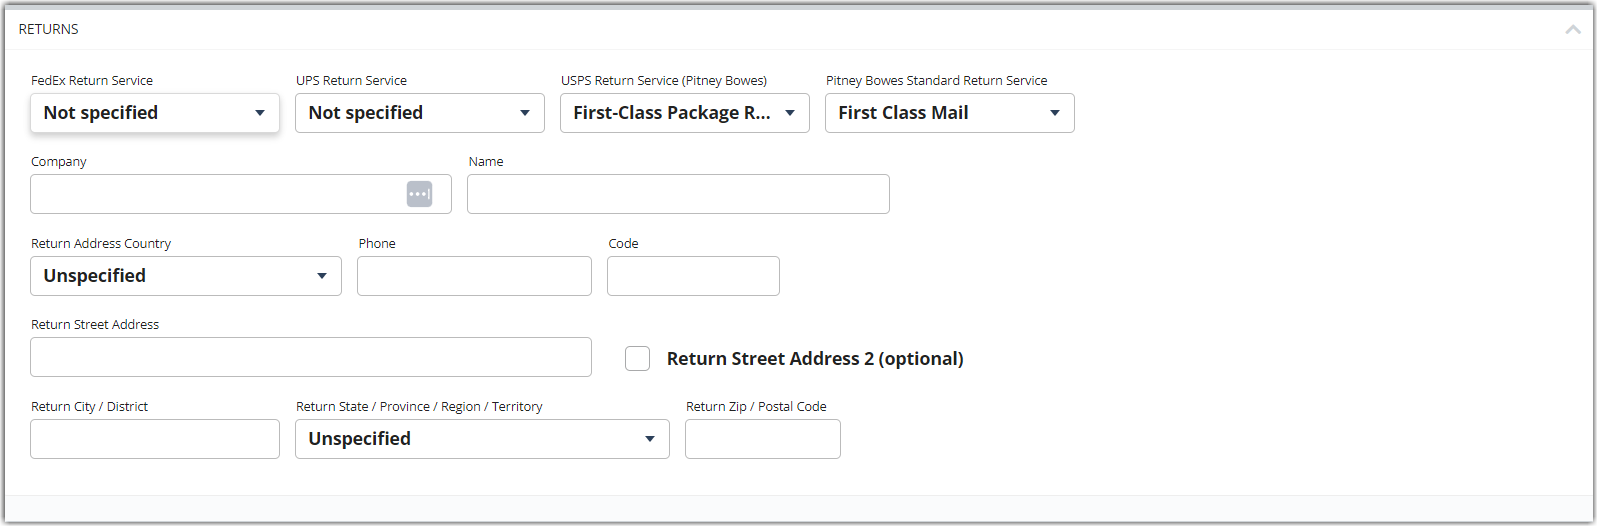
- FedEx Return Service: Specifies which FedEx service level is used for FedEx returns
- UPS Return Service: Specifies which UPS service level is used for UPS returns
-
USPS Return Service: Specifies the type of return when shipping with USPS—by default, the 'Priority' service level is used for USPS returns
- Standard Return: Bills the account the moment the label is printed by USPS
- Pay On Use: Bills the account once the return label is scanned and shipped by USPS (not supported unless configured through Endicia)
The remaining fields are used to specify what populates as the Ship From address on a shipping label for this customer, as well as the Ship To address listed on a return label in the event of a return. If no contact information is listed here, SmartParcel uses the facility's address defined in the WMS under Warehouse > Manage Warehouse.
Rate Shopping
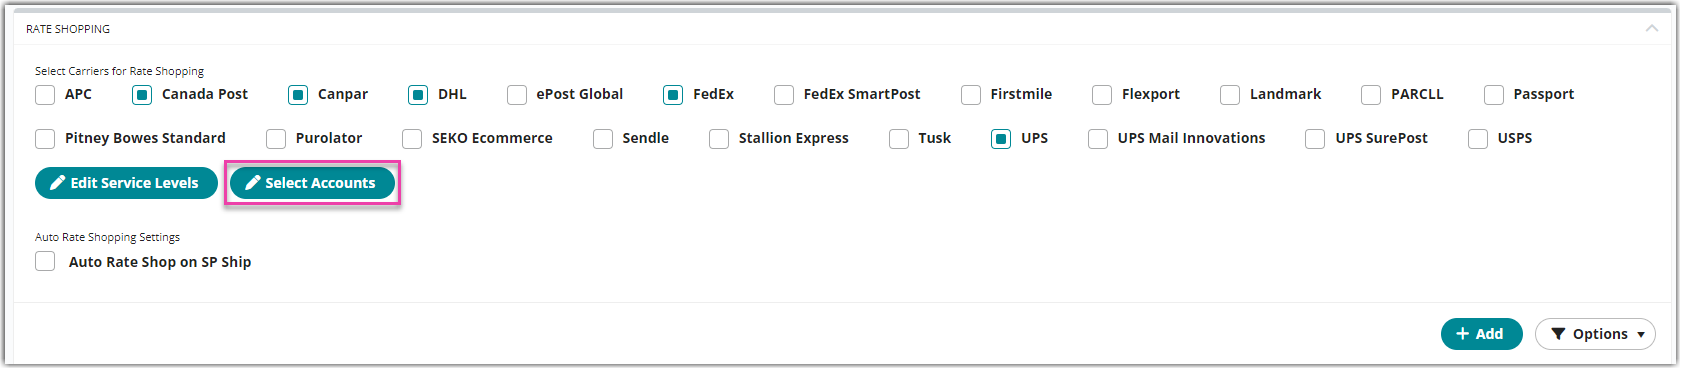
The Rate Shopping section is used to configure the logic required to rate shop.
This section also allows you to enable Auto Rate Shop on SP Ship, which triggers an automatic rate shop after you select 'Ship' or 'Pack and Ship' in the Pack and Ship dialog if you have rate shopping rules properly configured.
- Under 'Select Carriers', select each carrier you would like to enable for rate shopping.
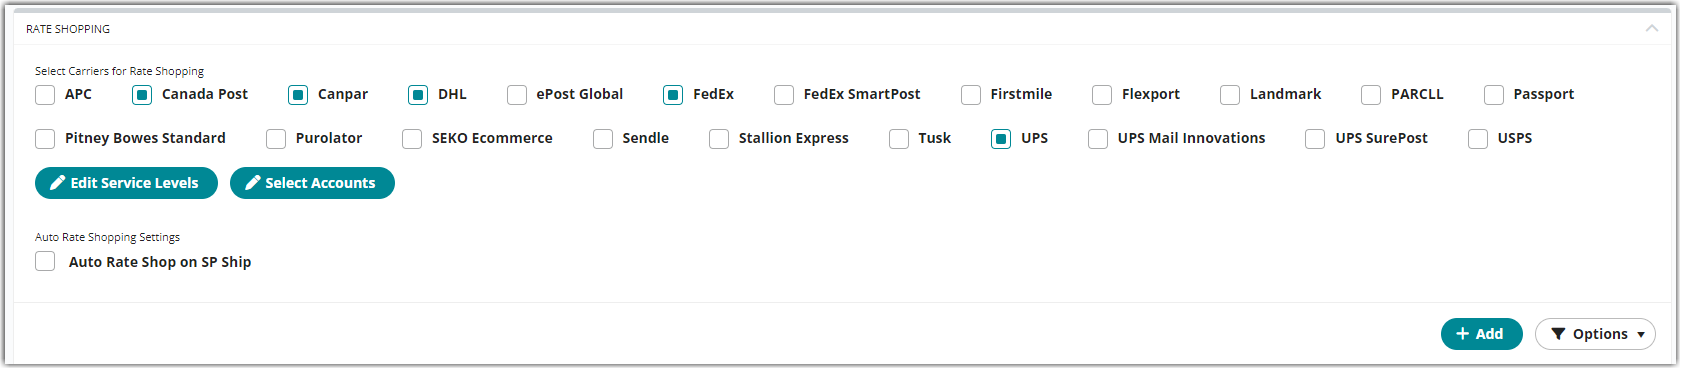
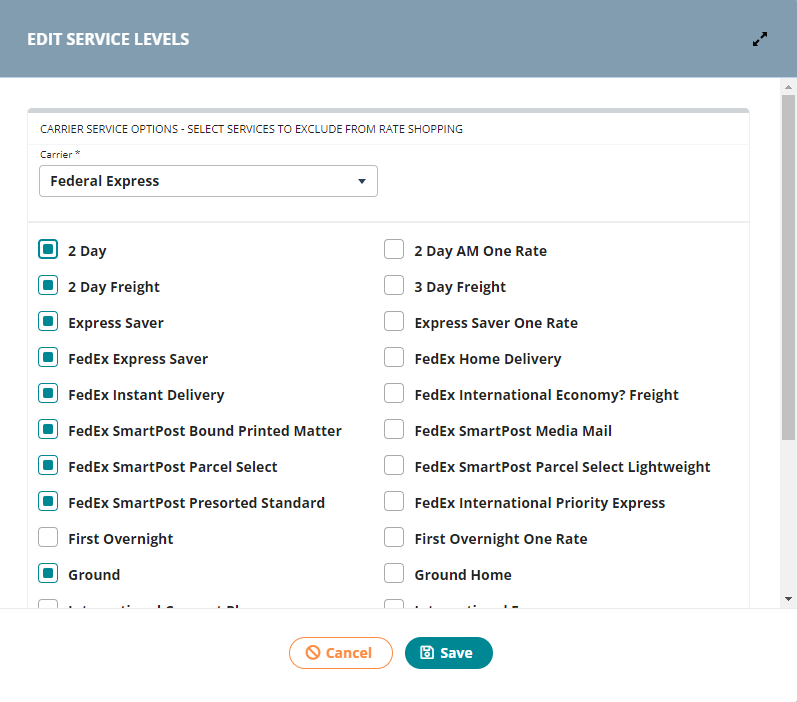
- To filter the results returned in Rate Shopping, click on the Edit Service Levels button to select services you would like to exclude from your rate shopping results.
If you want to rate shop for DHL eCommerce services, you must reach out to your DHL representative to enable API access for Extensiv.
- Click Add to open the Add Auto Rate Shopping Rule dialog.
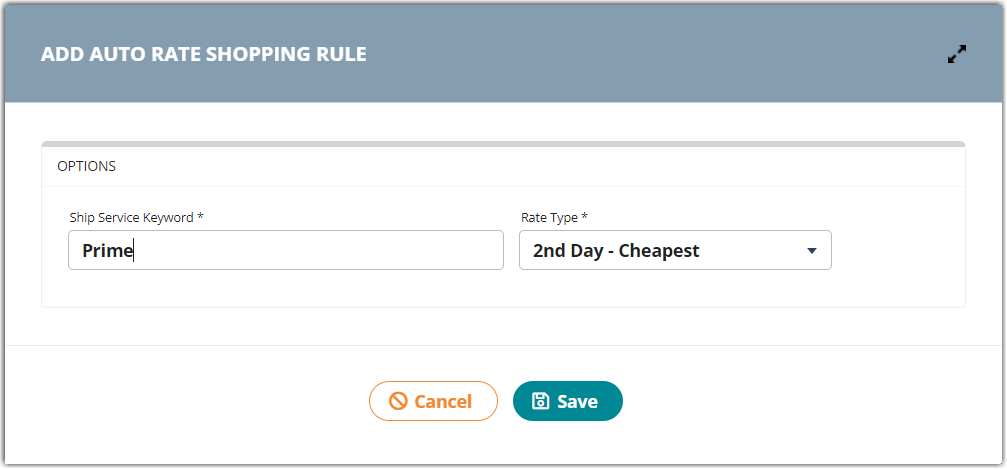
- Enter a Ship Service Keyword.
In the image above, "Prime" is an example value. To rate shop an order from the Small Parcel homepage, the 'Ship Service Keyword' must match the value inserted in the 'Service' field on the order. Note this value cannot be an existing service level for any carrier. - Select a Rate Type from the drop-down list, then click Save.
- Overnight – Cheapest: The cheapest overnight rate available
- 2nd Day – Cheapest: The cheapest overnight or 2nd day rate available
- 3rd Day – Cheapest: The cheapest, overnight, 2nd day, or 3rd day rate available
- 4th Day - Cheapest: Cheapest rate that would arrive within 4 days
- 5th Day - Cheapest: Cheapest rate that would arrive within 5 days
- Cheapest: The cheapest rate available with a known delivery date
- Cheapest – Independent of Delivery Date: The cheapest rate available regardless of delivery date
Once rate shopping is fully configured for a customer, you can assign rates to orders on the Small Parcel homepage.
- If you want the system to automatically select the cheapest rate for one or more orders at a time, ensure that the relevant ship service keyword is defined in the 'Service' field of each relevant order, select the order(s) from the grid, then click Manage > Shop Cheapest Rate.
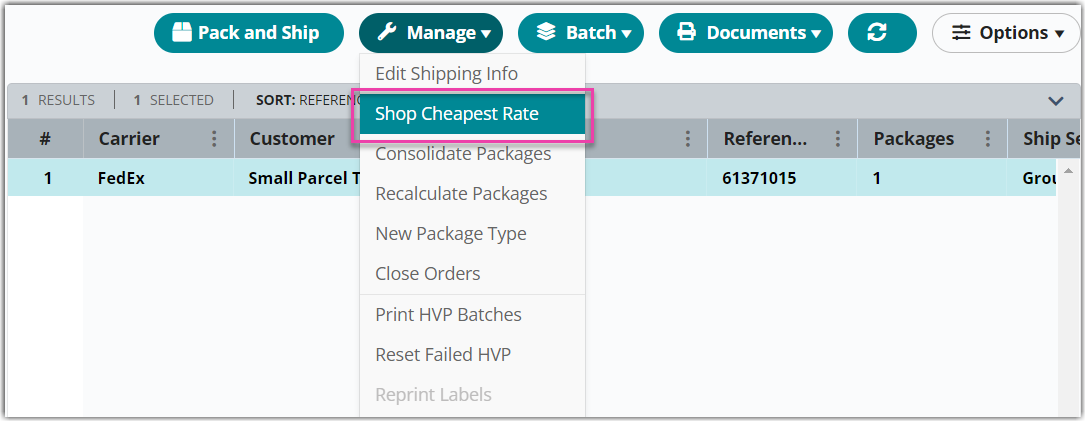
- Once selected, a confirmation message appears to inform you that your orders have had rates applied to them and which orders, if any, could not retrieve rates. Depending on the services you have listed in your orders and the rules you have configured in the system, the Carrier, Ship Service, and Small Parcel Ship Date columns of the Small Parcel grid populate with the cheapest shipping rate and estimated delivery date.
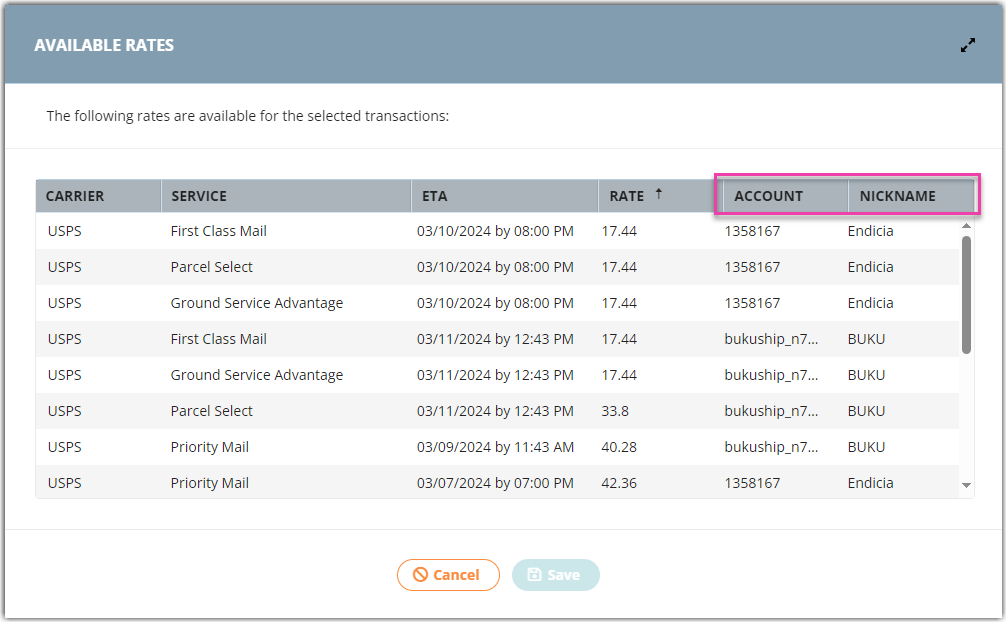
- If you want to request a list of available shipping rates for a single order, select the order from the grid, click Pack and Ship, then click Get Rates in the SmartParcel section. Select a rate from the grid, then click Save to apply the selected rate to the order and proceed with order processing as normal.

Please note that the returned rate reflects the shipping cost only and does not include duties and taxes.
Rate Shopping for multiple accounts
The Multi-Account Shopping feature lets you select multiple accounts you would like to rate shop from instead of shopping accounts one at a time.
- Make sure you have “Enable Multi-Account Selection” turned on.
- Click Select Accounts.
- Select which accounts you want to use per carrier.
You can only select accounts for carriers you have selected for rate shopping.
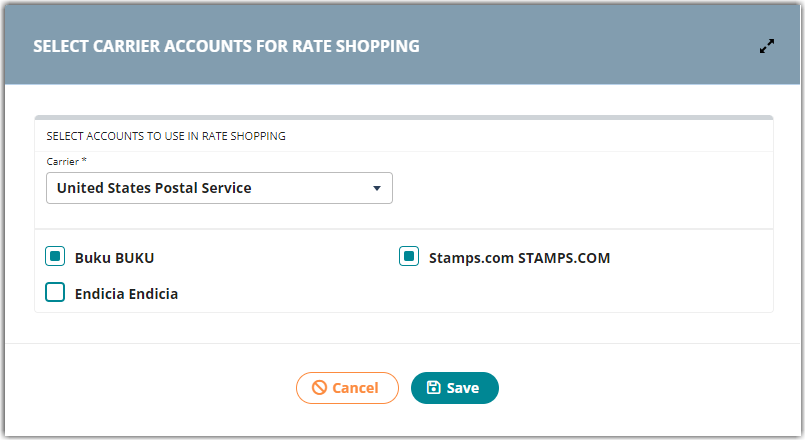
- Now when you go to Get Rates you will see the account number and nickname in the shopping results.
Your configuration settings of carrier accounts for rate shopping will also apply to the auto rate shopping function Shop Cheapest Rates.