
Packing from Shelves
SmartScan's 'Pack from Shelves' functionality combines Pick and Pack into a single operation so that you can simultaneously pick an order's allocated inventory and pack it directly into a package for shipping. Once an order is marked as Complete, the system automatically populates a pick/pack job for that order under Pack from Shelves and prioritizes jobs based on an order’s creation date and transaction number.
This article reviews how to pack from shelves using SmartScan.
SmartScan Pack From Shelves
Improved the display of packages when packing larger orders to make it easier to see the order in which the packages were added.
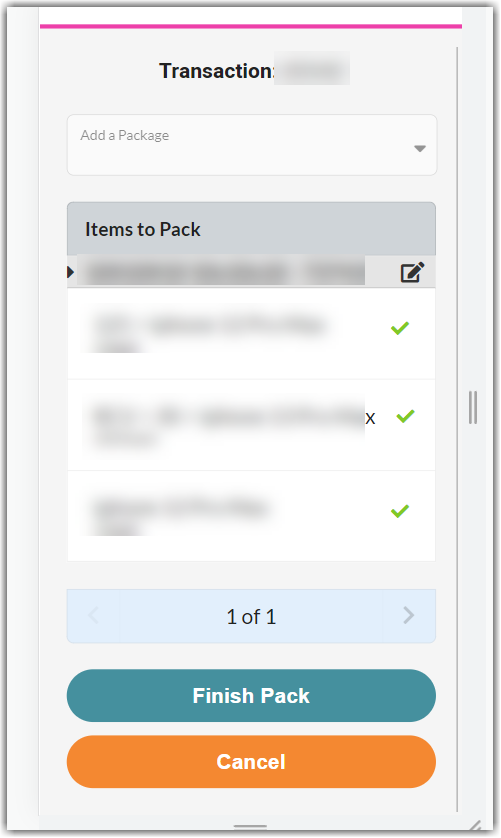
Note that the currently active package will always display at the top of the Pack Item grid when changing pages. Other packages that are already part of the order will display directly above the remaining unpacked order items. This allows you to access existing packages if you want to pack additional items into those packages.
Barcode definitions and GS1 barcodes are supported in this workflow. If you are using a supported Zebra device for the pick/pack process, you can successfully scan a defined barcode. Consumer devices are also supported but require you to manually select a package type and tap items to pack, rather than scan a SKU or UPC code.
To successfully pack from shelves, an order cannot have an associated Pick Done Date, and a user must have the following permissions assigned to their user role: Mobile Scanner > Mobile Picking and Mobile Pack.
- Log in to SmartScan.
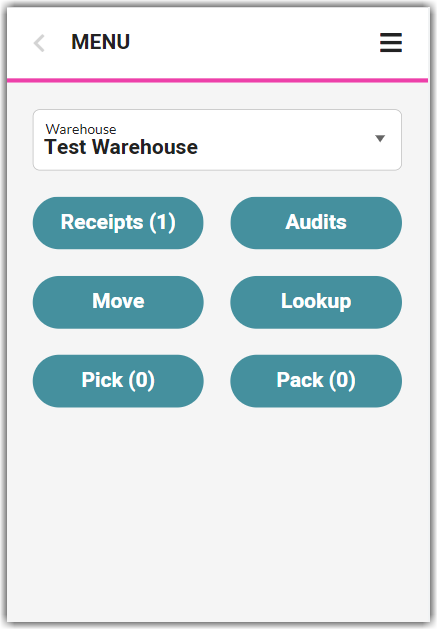
- Ensure the appropriate 'Warehouse' is selected from the drop-down list, then tap the Pack module. Note that the number displayed reflects the number of orders available to pack using the standard packing method.
- Tap Pack from Shelves, then specify the order you wish to pack using one of two methods:
- Scan the associated transaction number or tracking number.
- Select an order manually.
- To begin the order shown, tap Start Pick.
- To skip to the next prioritized order, tap Skip Pick. Once all orders are skipped, there is an option to 'Reset Pack' to return to the first order listed.
- Specify the first package by scanning the package barcode or selecting a package type from the 'Add a Package' drop-down menu. Once specified, the package type displays in gray under Items to Pack.
- Pick the first item by scanning the SKU/UPC barcode or selecting it from the grid. If the items being scanned do not have unique track-by values, you can scan the SKU multiple times to increment the quantity.
If a specific location is associated with the item, SmartScan directs you to proceed to that location. (If you are already in the specified location, tap the gray area around the pop-up to dismiss the message and proceed with the next step.)
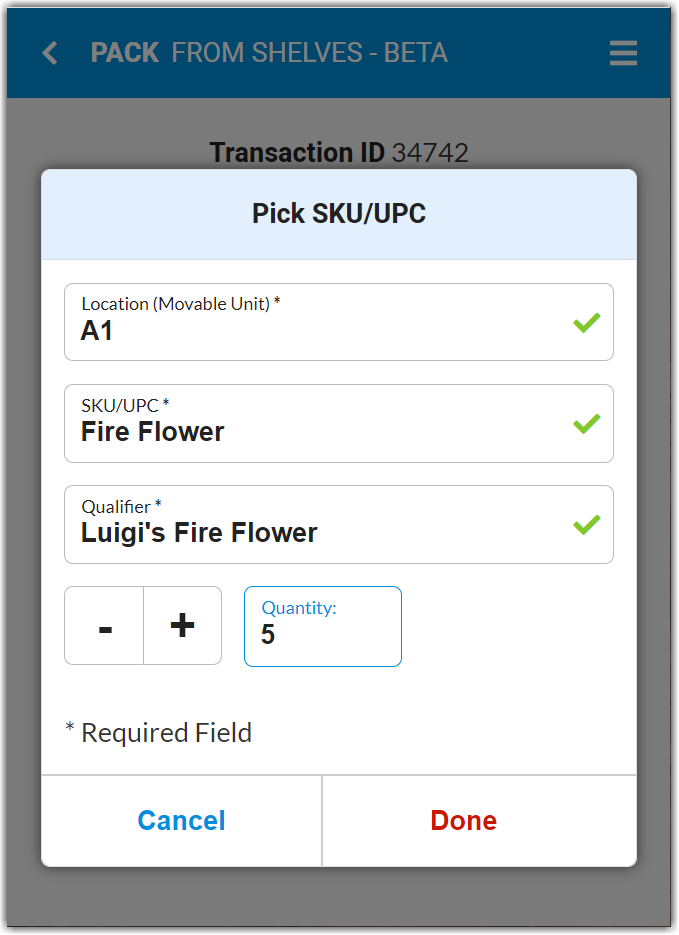
- Once you specify a SKU, the Pick/UPC dialog box opens. Scan or enter the Location or MU Label for the item.
For optimum efficiency, scan or enter an item's MU label to auto-populate each field. If the items being scanned do not have unique track-by values, you can scan the MU label multiple times to increment the quantity.
If 'Reallocate at Pick Time' is enabled for your account, you can pack items with track-by's that are different from what was originally specified on the order. This feature must be enabled in the relevant customer's settings, and the picker must have the following permission assigned to their user role: Orders Module > Order Allocation.
- Enter the SKU 'Quantity', then tap Done and pack the item into the specified package type. A confirmation message appears, and the line item shows a green check to indicate the inventory has been picked and packed.
- Repeat Steps 5–7 until all items are packed into the specified package type. If there are additional packages on the order, repeat Steps 4–7 until all items are packed.
- If you have multiple pages of line items to pick, tap one of the bottom arrows to navigate to the next or previous page of line items.
- If you have multiple line items with the same SKU and use the scanning functionality to specify the item, SmartScan marks the first SKU listed as packed and continue in the displayed order. If you need to pack out of order, you must tap the relevant line item from the grid rather than scan it.
- If you need to edit or remove a specified package type, tap the Edit icon in the package grid row. To edit, make your changes, then tap Save. To delete, tap Delete, then Yes, Delete to confirm that you want to unpack all items placed in the package.
- To unpack an item, select it from the grid, then tap Unpack. The green check then changes to orange to signify that the item is picked but not packed. To re-pack the item, select the correct package type, then tap the line item.
If you unpack the only item in a package, SmartScan automatically removes the package type from the order.
- Once you have packed all items on the order, tap Finish Pack.
If you were unable to pick all items on the order and you have the 'Force Pick Complete' permission applied to your user role, the application allows you to pack the partial inventory and prompt you to specify a reason. Once selected, tap Complete to receive a confirmation message.
- If the 'Manage Charges' permission (under the Orders Module permission set) is assigned to your user role, the Charges page opens for you to add and accept any predefined manual billing charges.
- To specify a charge amount, tap on a line item, enter a value for the '# of Units', then tap Save.
- Tap Accept to finalize the pack and apply the accepted charges to the order.
Once you finalize the pack, SmartScan redirects you to the first Pack from Shelves page that displays each order ready to be packed, and the Pick Done Date and Pack Done Date columns populate with the appropriate data in the Find Orders grid.
If you need to unpick or unpack an order's contents, it must be done before you finalize the pack. Once an order is assigned a Pick Done Date or Pack Done Date, you can no longer access the transaction in SmartScan.
Also note that it is not currently possible to unpick an item during this process—if you need to unpick an item, you can do so in the Pick module prior to completing the pack from shelves.