
Getting Started with GS1 Barcodes
To use GS1 self-defining barcodes with SmartScan, you must have already configured your barcodes with GS1—if you have not done so, please see their Get Started Guide. Please note that it is the product owners' responsibility to register with GS1 and label in accordance to the standard.
The GS1 data elements that SmartScan currently supports, as well as their respective AI and specs, are as follows:
- UPC, AI 01 – fixed length value; no FNC1 needed
- Secondary UPC or Packaging UPC, AI 02 – fixed length value; no FNC1 needed
- Lot Number, AI 10 – variable length; FNC1 required
- Expiration Date (YYMMDD), AI 17 – fixed length value; no FNC1 needed
- Serial Number, AI 21 – variable length; FNC1 required
- Quantity, AI 30 – variable length; FNC1 required
- SKU, AI 240 & AI 241 – variable length; FNC1 required
- Net Weight (Kg), AI 3100-3105
-
Net Weight (Lbs), AI 3200-3205
Scanned values auto-populate into the Weight field in the "Receipt Line Item" modal.
The value should still be captured and recorded in the DB even if the display of the Weight field is disabled in the SmartScan UI.
This setting is available in Manage Customers > Receipts tab > Mobile Receiving.
This article reviews how to identify the UPC of an item in 3PL Warehouse Manager for GS1 interpretation.
UPC and SKU are the only data elements that require you enter unique values for the relevant items in the system, while the rest of the elements listed above are track-by's that you enable in the item setup under Items > Tracking Options.
If you are tracking these data points, our 3PL experts recommend requiring the track-by's you want to capture from GS1 barcode scanning rather than simply enabling them.
Guidelines
These guidelines review the process for entering the relevant UPC value for an item, but if you have already set up the SKU field to reflect the UPC, SmartScan automatically recognizes it using the interpretation progression listed in Setting Up Barcodes.
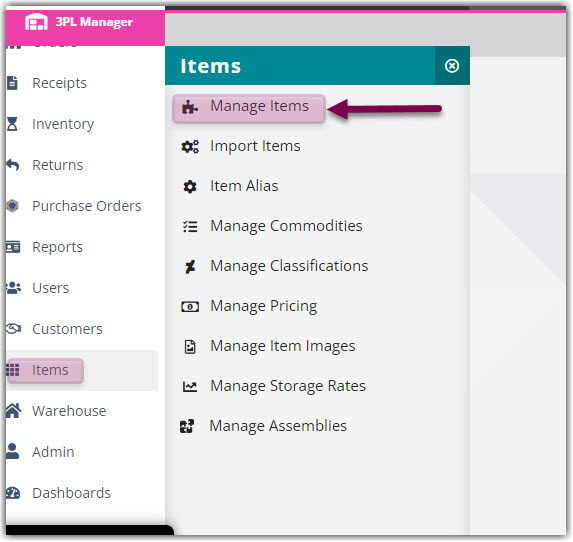
- In 3PL Warehouse Manager, navigate to Items > Manage Items and select the relevant customer.
- Select an item from the grid that is set up for GS1 scanning, then click Edit.
- Enter the assigned value in the 'UPC' field.

- If you have relevant track-by's, weight, and primary quantity configured with GS1, ensure that those fields are also complete and accurate.
- Click Save.
- Repeat Steps 2–5 for each item that needs configuration for GS1 scanning.
Once all items are configured with the appropriate UPC values, you can receive them as normal in SmartScan. When you add a new line item to a receipt and scan the relevant barcode, SmartScan interprets and populates all associated data elements. Increase the quantity if needed, then continue your receiving workflow.